Sep 29, 2008

Back-to-Basics: Paper Trimmers

Perhaps the most essential tool for beginning and seasoned scrapbookers alike is a quality paper trimmer. Like other scrapbooking tools, there is a wide variety and quality of paper trimmers available.

Paper trimmers have come a long way. I remember being excited the first time I saw a portable personal paper trimmer. I still remember the large metal paper trimmer at the church library or elementary school. I'm pretty sure that thing could cut your leg off if you really needed it to. It's massive and I can still hear the THWUNK sound of metal grinding on metal as it chopped huge stacks of paper all at the same time.

If you are like me, you've tried a variety of trimmers and found that not every trimmer is as easy-to-use, portable, and affordable as others. Some will cut several sheets of paper at a time and others are lucky to cut one. Some come with multiple blades to cut fancy designs, score your paper, or even give the paper a hand-torn look.

Let's look at some of the options available:

Small Trimmers - 5" to 8.5"

A small trimmer is perfect for taking with you to scrapbooking crops. It is perfect for cutting photographs and paper scraps, but isn't very helpful if you are trying to cut paper larger than the trimmer. Most small trimmers are in the $10.00 price range.

Even small trimmers have some amazing features. For example, let's look at the Cutterpede 5" personal trimmer. It has a matting guide, an elbow that sets the position for 5" paper size, a ruler that swings out for larger projects, a magnetic lock to hold the cutting bar in place, and gripper feet on the underside to ensure your work doesn't slide. It also easily folds up for portability.

Standard Size Trimmers - 12"

This is the most popular size of trimmer among scrapbookers because it can cut photos and paper scraps as well as 12x12 paper. I've found that the blades tend to wear out quickly so make sure you get one that has blades that can be easily replaced.

Also, look for a trimmer that has measured guides on the base. It helps with paper placement and to make sure your paper is straight. Fiskars has a wide variety of 12" paper trimmers. Fiskars is a name you can trust when it comes to the cutting business. Most 12" portable trimmers are around the $20.00 price range.

If you scrapbook at home and don't necessarily need a portable trimmer, there's a huge variety of stationery trimmers. They are generally a more heavy-duty machine and will cut more than one sheet of paper at a time, with a cleaner cut. These trimmers start around $59.00 and go up from there. You definitely get what you pay for.

As you make a decision about a paper trimmer, keep in mind what you'll be cutting, the weight of your paper will determine the type of trimmer you'll need. Also keep in mind portability and price. If you've used a paper trimmer you absolutely love and couldn't do without, be sure to let me know and I'll pass the word along.

Return to the Neighborhood.

Sep 26, 2008

Rolling in the Dough

I admit it. I still love play dough. The salty smell of it brings back happy childhood memories, and it's always more fun when you make it yourself. And with the easy homemade playdough recipes below (edible and non-edible), you and your kids can prepare playdough in no time and at a fraction of the cost.

You can also turn simple household items into playdough tools, such as cookie cutters, plastic butter knives, forks, pizza cutters, a garlic press, melon baler, rolling pins, etc.

Remember to store the playdough in Ziploc bags or an airtight container so that it lasts for a long time. And here's a cool tip: Add vanilla, orange, or lemon extract to homemade playdough recipes - it helps preserve the dough, prevent mold, and makes it smell nice.

Most of all, don't forget to have fun and be creative.

Traditional Play Dough
1 cup flour
1 cup warm water
2 teaspoons cream of tartar
1 teaspoon oil
1/4 cup salt
food coloring
Mix all ingredients, adding food coloring last. Stir over medium heat until smooth. Remove from pan and knead until blended smooth. Place in plastic bag or airtight container when cooled. Will last for a long time.

Mister Rogers' Easy Play Dough
2 cups flour
1 cup water
Mix together well. You can put dry Kool-Aid or Jell-O in the mix if you want colored dough.

Kool-Aid® Play Dough
1 cup flour
1 tablespoon vegetable oil
1 package unsweetened Kool-Aid
1/4 cup salt
2 tablespoons cream of tartar
1 cup water
Mix flour, salt, cream of tartar and Kool-Aid® in a medium pot. Add water and oil. Stir over medium heat 3 to 5 minutes. When mixture forms a ball in pot, remove. Knead until smooth. Put in a plastic bag and refrigerate.

Edible Peanut Butter Dough
1 cup creamy peanut butter
1/4 cup honey
1 cup instant nonfat dry milk
Mix together until smooth.

Sep 22, 2008

Altered Art: Cookie Sheets

Altered art is a new craze in the craft and scrapbooking industry. So, what is altered art? It's basically taking something old--usually a common household object--and making it new again by decorating it creatively and for a different use than that originally intended.

There are tons of cute projects and I'm going to occasionally share some with you. Today, we are starting with cookie sheets. You've probably all seen the new metal magnet boards available in craft stores. They come unfinished and you can paint, stamp, or cover them with paper and then make fun, unique magnets to hold things such as pictures, homework, reminder notes, or even the family calendar.

Well, instead of purchasing the expensive metal magnetic boards, you can simply use a cookie sheet. You can even usually find them at the dollar store. Use scrapbook paper, stamps, stickers--really anything you would use on a scrapbook page and decorate it anyway you want. I've included a few pictures to get your imagination going.


To the right is a calendar that is completely magnetic. The months and numbers were just printed on cardstock, laminated and then attached to strips of magnet that were sticky on one side. You can find magnet like this on a roll at any craft store. Create fun pieces for birthdays, holidays, and other special occasions. You can store the pieces you aren't using on the back of the cookie sheet. If you want to paint your cookie sheet, use sandpaper to rough it up a bit so the paint will adhere better.

Altered art is a great activity to do with your kids. It's always fun to create something new from something old. Check back soon for more altered art projects.

Return to the Neighborhood.

And while you're there, subscribe to our fantastic newsletter. Welcome to the yourLDSneighborhood newsletter. In addition to being able to shop in the new virtual neighborhood, the LDS newsletter brings you LDS articles, LDS products, LDS services, LDS resources and LDS interviews from around the world—all with an LDS focus. Look for issues delivered to your email inbox every week on Monday, Wednesday, Friday, and Saturday.

LDS Newsletter Subscriptions are FREE, and joining is easy.

Sep 19, 2008

Back-to-Basics: Adhesives

Today I want to discuss one of the most basic elements of your scrapbook--adhesives. As a new scrapbooker it can be confusing knowing which kind to use. They come in a multitude of choices.

Scrapbook pages are no longer just two-dimensional with pictures, paper, and stickers. There are now many 3-D elements such as metal, fabric, and ribbon. There are different adhesives that work best with each of these unique elements.

First of all, keep in mind that any adhesive you use on your scrapbook must be photo safe, particularly when you are adhering the actual photographs. You want them to be preserved over time and using acid free adhesives will ensure their safety.


Here are a few adhesive option for you to consider:

Photo-Corners: These are the oldest and most basic adhesive. I remember looking through photo albums as a child and seeing them, long before scrapbooking was popular. They were intially used because it allowed photographs to be attached to the page and still be easily removed. They are ideal for vintage photos or anything you don't want permanently attached to the page, and they now come in fun colors and designs.

Glue: This comes in many forms. You can get it in bottles, pens, and even preformed dots. It is the most versatile adhesive and glue pen allows you to put even a tiny dot, anyhwhere you need it. It comes in permanent and repositionable varieties and there are also specialized glues made specifically for fabric and metal. And don't forget the plain old glue stick. It allows you to cover a large area quickly. Make sure you get acid-free glue sticks and don't just use the ones made for school projects.

Adhesive Sprays: The advantage of a spray is that you can get even coverage over a large area. They are also usually transparent and work very well with vellum and other papers you can see through. Make sure you cover anything you don't want sprayed. They can be a little messy.

Tape: Most scrapbookers use double-sided tape to adhere photos and page elements. It comes in many forms such as strips, and pre-cut squares. There is a multitude of tape dispensers on the market. My favorite ones are the refillable type you can use over and over. The square can be used to adhere smaller items and strips for large photographs and matting. There is also foam tape which adds a unique three-dimensional look to your scrapbooking projects. It's particularly fun to use on titles and any other element you want to "pop" out.

I personally use mostly tape and occasionally glue sticks and dots. I like glue dots for attaching metal and heavier embellishments. It's stronger than tape and holds them in place. Experiment for yourself with the different options and use whatever you like best. Although not very exciting, it's an essential element to consider and there are tons of varieties to make your scrapbooking easier.

Return to the Neighborhood.

And while you're there, subscribe to our fantastic newsletter. Welcome to the yourLDSneighborhood newsletter. In addition to being able to shop in the new virtual neighborhood, the LDS newsletter brings you LDS articles, LDS products, LDS services, LDS resources and LDS interviews from around the world—all with an LDS focus. Look for issues delivered to your email inbox every week on Monday, Wednesday, Friday, and Saturday.

LDS Newsletter Subscriptions are FREE, and joining is easy.

Sep 15, 2008

Interactive Pages

Do you remember lift-the-flap board books from your childhood that had hidden pictures, pockets, and tabs to pull with surprises behind them. My children love them. You can recreate something similar on your scrapbook pages.

Hidden journaling is always an adventure and a fun surprise. You can use techniques such as library pockets (get a template here), envelopes, cards, tabs, a gatefold card tied with ribbon, CD pockets, hidden flaps, mini file folders and more. You are only limited by your imagination.

In the layout to the left, a hidden journaling pocket is created behind the picture itself. Put three strips of adhesive on the sides of the picture where the journaling card does not slide in. This creates a pocket behind the picture. Add a pull tab to slide the journaling card out.

If you use page protectors, to easily access the journaling card you can cut a slit in the page protector to enable you to slide the card in and out. If you make the cut along a line or a matted edge in your layout it will be most unnoticeable.

In the layout on the right, in the lower corner there is an accordian mini-book. It's a great place to put extra pictures that won't fit on the layout and include more journaling. By adding ribbon to tie it closed, it becomes an embellishment for your layout.

You can see inside the mini-book here and watch a video about how to make it. It's really cool! Check it out.

Creating interactive pages for your scrapbook by using flaps, tabs, and other pieces that move, allows you to include more pictures and journaling and just makes your scrapbooks a whole lot more fun!

Return to the Neighborhood.

Sep 11, 2008

"Quotes to Remember"

Each scrapbook is unique. No two will be alike, nor would we want them to be. However, most of the scrapbooks I've personally created are very similar. I like to add some originality to each of them and I've found that using quotes is one fun way to do that.

Quotes can be used as the journaling on your page, or simply as an embellishment. Famous quotes from a particular era are fun to have in your books. You can also include quotes from family members about the people in the pictures. These often mean more to the individual than just some random quote.

For baby books and children's scrapbooks, you can quote your child. You can add their favorite sayings, their 'first words', or funny things they say.

Adding quotes to your pages makes your scrapbook more 'readable' and interesting to look through. There are many meaningful quotes available that can get your message across when you just can't quite find the right words.

I've included a few of my favorite quotes below:

"If you live to be a hundred, I want to live to be a hundred minus one day, so I never have to live without you." ~Winnie the Pooh

"Life isn't about waiting for the storm to pass, but learning to dance in the rain." ~Author Unknown

"In the eyes of a child...there is joy, there is laughter... there is hope, there is trust, a chance to shape the future..." ~Air Supply

"A child fills a place in your heart, you never knew was empty." ~Author Unknown

"One of a parent's best jobs is waiting at the bottom of a long slide." ~DeeAnn Stewart

"Only love can be divided endlessly, and still not diminish." ~Anne Morrow Lindbergh

There are tons of resources on the internet to find quotes on pretty much any subject. Check out this link for lots of ideas.

Return to the Neighborhood.

Sep 10, 2008

Blog Tour: The Santa Letters by Stacy Gooch-Anderson

I love to read Christmas stories. They get me in the right frame of mind for the Christmas season--help me focus on the important things. The Santa Letters is just such a story. It begins with a look at the Jensen family. We see how much Emma and William love one another and their family. The story turns tragic as we realize that William has died and Emma is left alone, struggling to raise and support her children. It is Christmas time and Emma is feeling anything but cheerful.

One evening a mysterious, yet beautiful, letter arrives on their doorstep. It begins a journey of self-discovery and forgiveness. The family receives a new letter each day with instructions for an activity they need to complete together. Through these activities and acts of service they grow closer together and bring peace and love to their home for the Christmas season. They receive many gifts and reminders about the good things in life from the letters such as warmth, music, traditions, laughter, friendship, heritage, and ultimately healing.

The Jensens come to realize that the joy of Christmas doesn't have to be lost forever - and that God's love can heal any wound, no matter how deep.

It is a heartwarming look at the grief a family goes through when losing a loved one. It was particularly meaningful for me because I'm struggling with some personal losses myself. It gave me renewed determination to be grateful for what I have and the desire to focus on the positive

Now, a few comments from my writers point of view: There was a little too much head-hopping and some POV issues throughout the book. I felt like we saw a lot of emotion from Emma, but I wanted to see a little more from the children. The perfect family life they had seemed a little too ideal. Most families have some fighting and contention and if some of that had been included, it would have seemed a little more realistic. However, I realize that wasn't the intention of the book.

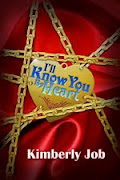
I absolutely love the cover. It's deep rich colors and elegant feel make it perfect for gift giving. It will be a permanent addition to my bookshelf.

I highly recommend The Santa Letters. I've reviewed many books this summer and this is my favorite so far. You can purchase it online at Amazon or at Deseret Book

Stacy answered a few questions about this book and writing in general. You can see her answers below.

When did you first consider yourself a writer?
I'm not sure I still do. I just consider myself lucky enough to be able to do something I love. But to say I'm a writer brings to mind people like John Steinbeck, Hemmingway or Charles Dickens and I don't quite see myself on that plane...;-)

Is your book based on a personal experience?
It's based on some personal experience mixed along with figments of my imagination and a healthy dose of inspiration. The Snata Letters are real and some of the characters are loosely based on my children but Guillermo's story is fictional. You can read more about what is 'real' and what isn't at www.thesantaletters.org.

How long did it take you to write the book?
Since I had the story already in my head, when I sat down to write it, it only took me about three weeks. But to live the Santa Letter experience, and gain the insight I needed to write the story, took me years.

What books or authors have most influenced your writing?
Any literature that I can put my hands on, but I partcularily like Nathaniel Hawthhorne's The Sacrlet Letter, Richard Paul Evan's The Christmas Box and Charles Dicken's books.

What can we look for next? What current projects are you working on?
I am working on several but the one that is foremost in my mind is the companion book to The Santa Letters called The Inmate Letters. It picks up with Guillermo's story and continues on with his relationship with the Jensens. You can read all of the stories I am working on at my website www.stacyganderson.com. The first chapter to The Inmate Letters is on the website at www.thesantaletters.org.

If you had to do it all over again, would you change anything in your book?
Not really becasue I did it the best I could for that given moment in time. Life is about going forward not looking back with regrets. I will take what I've learned and incorporate those lessons into the other books I write but not look back at the woulda, coulda, shouldas.

Is there anything you find particularly challenging in your writing?
Sometimes I get stumped on plot lines or something doesn't seem quite right. That's when I take a break and then come back to it later. That usually helps.

Do you have any advice for other authors?
Find your inner voice and go with that since that will dictate your passions and direction. And then write! Do whatever you can to hone your skills and tighten your writing and don't give up on yourself or your talent. It just needs to be developed, and with time, things will come together if you have the passion.

What do you like to do when you're not writing?
Be a wife and mother and enjoy my family. I take my sons to soccer and hockey, chat with my husband, shop with my sister, have family gatherings with my siblings cousins, and aunts and uncles whenever we can and just enjoy the blessings of having a great family.

Any last words you want the reader to know?
Believe in yourself and when that is not enough, believe that Heavenly Father believes in you too

As you can see from Stacy's answers, she is not only a great writer, she's an amazing person and one of the kindest people I know. Pick up a copy of The Santa Letters today. You won't regret it

You can learn more about Stacy and The Santa Letters at Stacy's website and blog.

Sep 8, 2008

Back-to-Basics: Cropping

I thought occasionally I'd blog about some scrapbooking basics. Lots of you are experienced scrappers, but I know there are a few beginners out there as well. Hopefully even the experienced scrappers can glean something from the information I share. And as always, I'm open to any suggestions, tips, or techniques you've picked up and would like to share.

Trimming your photographs is one of the first things that most scrapbookers are taught. At first, it seems difficult to do. Cut my pictures? You've got to be kidding. But, we do this for several reasons. The first of which is that allows you to fit more pictures on the page. It can also create a focal point for your page and removes distracting or unnecessary background images.

When I first started scrapbooking, back in the early '90s the trend was to crop your photos into unique shapes; circles and ovals were the most popular, but it wasn't unusual to see hexagons, hearts, and even stars. The current trend is focused less on the shape of your photograph and more on the quality of the photo. Close-up photos are very popular. You can achieve this look by cropping them closely even if the original photography wasn't close-up. It is especially easy to do this with digital photos. You can crop and enlarge them on the computer before you ever print them.

Tip: This may be personal preference, but when cropping photos, avoid using decorative scissors. The fancy edge draws your eye away from the photo and becomes distracting. Instead, use the decorative scissors to cut mats for your photos from complimentary colors of cardstock. This allows you to still have the decorative edge, without taking away from the photo itself.

When cropping photos, show only the most important parts of the picture. There are several different cropping techniques you can use. You can use scrapbook templates, silhouetting--cutting around the main subject, or bumping part of the picture out beyond the “frame”. Feet, hands, hats, balloons, are ideal. You are limited only by your imagination. Remember, to not overuse unique cropping techniques. They stand out and you don't want them to become common throughout your scrapbook or they lose their appeal.

Cropping effects are a great scrapbooking technique to add character and personality to a page. However, try not to go overboard. It is easy to fall victim to wanting new and exciting effects on every page. Remember you want to get your pictures into a safe album with journaling--not waiting in boxes for years while you cut paper into intricate shapes for every single shot!

Sep 5, 2008

Personal Die-Cut Machines

Over ten years ago, I purchased a large Ellison die cut machine. At the time, the only people using such machines were scrapbooking stores and elementary schools. It was large and bulky, weighing in at over 25 pounds. There is absolutely no way I was lugging that machine anywhere. Since then, personal die cut machines have come a long way and become a very popular tool among scrapbookers.

But what is the best kind? What are the differences between them? Which will best fit my needs? These are a few of the questions I hope to answer for you.

There are lots of different models available and it can be difficult to sift through them to find the one that's right for you. I've listed a few of the most popular ones below with some of their features.:

SIZZIX
This machine uses steel-rule dies. It can cut a wide variety of materials. It's designed to used only with sizzix dies (sold separately). If you are interested in purchasing the dies at a good price, check out the Sizzix Outlet on eBay. In my opinion, this is kind of the old-style way of using die-cuts. With all the new electronic models this type of machine may not be around for long.


XYRON WISHBLADE
This is a computerized die cut machine that you hook to your home computer. You print the designs on a color printer and use the Wishblade to cut them out. One cool feature is that you can cut-outs of any font you have on your computer. It is on the pricey side, but people who buy them seem to think it's worth the investment.


CRICUT
This stand-alone cutter does not require a computer. It is an electric machine that uses cartridges for the die cuts. There are a variety of cartridges available. And although they can be somewhat expensive, they have multiple images on them. This machine is portable. There is also the new Cricut Expression which can cut dies up to 23 inches long. The nice thing about the cartridges is that eliminates storing a bunch of bulky dies. You can shop for discounted Cricut cartridges here.


QUICKUTZ REVOLUTION
This machine is compatible with all of the Quickutz dies, including their new Cookie Cutter line. They also have the Silhouette which is a digital cutting system. You can download images from the internet. It requires no cartridges or CD. It will also cut any Truetype font from your computer.


SLICE
This is a brand new product being released by Making Memories in October 2008. It weighs less than two pounds. This 5 inch cordless wonder can cut anywhere on any kind of media. It uses design cards.


For more information about each of the above designs, click on the name of the machine and it will link you to the manufacturers' websites where you can get more details.


As you can see, there are a lot of different options when it comes to personal die cut machines. Even if cost is not a consideration, the most expensive model may not be the best one for your needs. Before shopping for a machine, it is a good idea to sit down and think about what features are most important to you, and make your purchase based upon your needs. Be sure to consider things such as the size of dies you want to cut, upfront costs required, and the portability of the machine.

Return to the Neighborhood.

Sep 1, 2008

Circle Journals

Have you heard of a Circle Journal?

My daughter and I have a notebook we write in and pass back and forth. It all started because I did something to make her mad and she didn’t want to talk about it. I wanted her to know how I felt and that I was sorry, so I purchased a cute notebook (it happened to say Angel on the front, which is what I call her). I wrote my feelings, then put the notebook under her pillow. She found it when she went to bed. She wrote back and put the notebook under my pillow.

Since then, we’ve passed the book back and forth. It contains some serious conversations, as well as lots of fun silly ones. It’s a place we can be ourselves, and we’ve gotten to know each other better throughout the experience.

Most important of all, it’s a keepsake we will have forever. It details the growth of our relationship as mother and daughter. I think I’ll have to make a copy for her, because I know I can never part with it.

A circle journal gives you a place to capture feelings and bits of real life between family and friends. Begin your Circle Journal by writing down a simple thought, idea or question. Now pass it on to a family member or friend. You can place it on their pillow, leave it on a doorstep or even mail it. They will read what you have written, add their thoughts and pass it back to you. The journal circles back and forth through the years, capturing relationships as they grow and change . . .becoming one of your most cherished keepsakes.

Start the circle between parent to child, sibling to sibling, spouse to spouse, grandparent to grandchild, friend to friend . . . the possibilities are endless.

Ideas to get you started:
- I love you because...
- When I was your age...
- What made you happy today?

There are many scrapbook manufacturers who have circle journals you can purchase. My favorite ones are from Pebbles Inc. But you can also just use any journal or notebook.

There is also a recent trend for scrapbook groups to create circle journals. They typically have a theme, and each scrapbooker makes a one or two page layout on that theme before passing it on to the next group member. It is a great way to get to know people before some type of event (such as a scrapbook convention) or a way to stay in touch with people you already know (like your best friends from college).

It would also be fun to create with family members. You could pass it around to all the brothers and sisters, each creating scrapbook pages of their family members, and then give it to Grandpa and Grandma as a gift.

However you decide to do your own circle journal, it will be uniquely yours, and will be a keepsake you will treasure always.
Related Posts Plugin for WordPress, Blogger...