Dec 29, 2008

Guilt-Free Resolutions


Happy New Year! I can’t believe 2008 is gone. It’s been a year of major changes for me, and I’m glad to put it behind me. I always love the feeling a new year brings. I like having a fresh start and the chance to look back on the previous year and make goals for the new one.

I have a whole list of resolutions, most of them not related to scrapbooking. My scrapbooking goal for the year is to learn more about digital scrapbooking so that I can start doing more of it myself, as well as be able to share more tips and techniques with all of you.

Scrapbooking may not be a high enough priority in your life to even make it on your resolution list. And you know what? That is perfectly okay with me. I’ve done my share of making resolutions that are sure to do nothing but make me feel like a failure and pile on the guilt. I’ve decided I don’t need that. Believe me, I’m good enough at the guilt thing, I don’t need to make goals to achieve it.

This year, as you make resolutions, scrapbooking or otherwise, be sure to pick ones that are realistic for you, your timeframe, and your current situation in life. Scrapbooking is somewhat of a paradoxical situation. When you have a young family, you take lots of pictures and want to scrapbook them, but don’t have the time. I’ve spent a lot of time feeling guilty for not being able to keep up on my children’s scrapbooks. I’ve finally decided, It’s okay. If I don’t have the time, there’s no purpose achieved by constantly feeling guilty about it. Once I came to grips with that, I decided the best I could do for now was to keep the pictures that I take organized so that when we are searching for a picture, it’s easy to find, and then when I do have more time to spend scrapbooking, the pictures will be sorted and labeled.

So with that said, here are a few ideas for scrapbooking resolutions. Many of them are designed to produce less guilt about not being able to do more. And some are just fun ideas I ran across that I’d like to incorporate when I have the time:

• Worry less about scrapbooking. The pictures aren’t going anywhere.
• Spend time journaling. The details will then be available when you have time to scrapbook.
• Start a Blog. Blogging is a great way to record the simple details of life that make it so interesting.
• Use up the supplies you have. Don’t purchase more supplies just to store them on the shelf.
• If you have products you know you won’t use, sell them. Ebay is a great place for this.
• When making cards, make two instead of one. It only takes a little more time and will save you time when you need a card in the future. Or you can use the extra cards to give away in a set as a gift.
• When making your own layouts, make an extra one to have “Just add pictures” scrapbooking pages you can give as gifts.
• Complete one layout per week.
• Hold a monthly scrapbooking party with friends.
• Learn one new digital technique every month.
• Attend one scrapbooking weekend retreat this year.
• Submit a layout to a scrapbooking magazine.

I wish you a very happy New Year and I hope this year will be a great one. I look forward to sharing ideas with you and learning right along with you as we discover together the amazing world of scrapbooking. If there are ever any topics you’d like me to cover, please leave me a comment.

Return to the Neighborhood.

Dec 27, 2008

New Blog

I've been selected by Prevention Magazine to try out, and blog about, a new diet plan. Perhaps you've heard of it--The Flat Belly Diet. I submitted a writing sample and was excited to be selected out of hundreds of applicants.

My Buzz Blog (Prevention's blogging terminology) is located here. Come on over and bring all your friends. I'll have free carrot sticks for everyone who visits. :) I'll give you the scoop about the diet and my honest opinion about what works, what doesn't, and how I've made adjustments to tailor it to my own personal dieting style. (Yes, sad to say, I've been dieting long enough to develop a personal style.)

So far it looks pretty promising. I've been doing the diet for three weeks today and have lost 15 pounds so far. Seven of those were during the initial four-day jumpstart. So come on over and follow my progress. To learn more about the diet, click here.

Dec 26, 2008

Scrapbooking Calendars

Now that the Christmas hustle and bustle is over, it’s time to start thinking about the new year. I love this time of year and the opportunity it gives me to reflect on the year ahead and organize my life again. I have a large family, so when I think of organization, the first thing that comes to mind is our family calendar. We use it to keep track of everyone’s activities. I’d be lost without it—there’s way too much going on to remember it all.

So, on that note, today I’m going to give you some ideas on making calendars for the new year. Scrapbooking calendars are fun to make and also make great gifts. You can create a calendar using traditional scrapbooking methods, or design it digitally. There are many digital websites that have calendar templates available. Some even have the design done for you and you can just add in your own birthdays, anniversaries, and other important dates. Here is one created for your computer desktop for December. Just do a Google search for digital scrapbooking calendars and you'll find lots, and most of them are free!


For this blog, we are going to stick with making calendars using traditional methods. First, make a calendar template on your computer using any calendar software. There are a variety of templates available in Microsoft word. Add in special dates such as birthdays, anniversaries, and holidays. If you use a calendar program such as Calendar Creator, it will carry your dates over from year to year. If you don’t have a program you want to use, check out SmartDraw.com or TimeAndDate.com.

After making the calendar at home, you can save it on a disk or thumb drive and take it to a copy store such as Kinko’s and have them enlarge it to whatever size you want. I like a 12x12 size. This gives me a full 12x12 space to scrapbook on for each month. Kinko’s can also add a spiral binding. Another, even simpler, option is to purchase a blank calendar from your local craft store. They are available in a variety of sizes. The only disadvantage to this is you have to handwrite details on the calendar pages.

Now it’s time to decide what you want on each page. One fun idea is to use pictures taken during that month from the previous year. Make sure they are themed, such as snow pictures for winter, swimming pictures for the summer months, and maybe pictures in leaves for the fall. Another idea is to include pictures of family members who have a birthday or anniversary that month.

Now for the fun part, create your pages just as you would create a scrapbook page. Cover your design area with patterned paper. If you are using a 12x12 calendar you can use a whole sheet, otherwise trim it to the desired size. Add photographs, matting, stickers and embellishments. Pretty much anything you would put in a regular scrapbook can be used on a calendar also. You don’t need to feel like they are wasted, because when the year is over, you can cut off the binding and put the pages in an album.

I hope this has given you a few ideas for making your own scrapbook calendar. Have fun with it. In a few short hours you should be able to create something you can use and enjoy all year long. Once you make one, you will keep your eye out this year for fun photo opportunities for next year’s calendar.

Return to the Neighborhood.

Dec 22, 2008

Scrapping Christmas Traditions

When you think of the word tradition, what comes to mind? The first things I think of are family traditions centered around the holidays, particularly Christmas. Often traditions have roots so far in the past that you may not even think of it as a tradition. As you're running around in all the holiday hustle and bustle, take some time to think about your Christmas preparations and which ones you traditionally do every year, then contemplate which would make an interesting scrapbook page.

For example, the tradition of opening presents. Some families open presents on Christmas Eve while everyone is gathered, some open one present on Christmas Eve, and some wait until Christmas morning. Pictures taken while opening presents and a blurb about why and how you do it, would make a fun page.

Decorating the house is always an important Christmas tradition, and an easy one to scrap about. Have you ever considered taking pictures of the decorating process, from carting the boxes up from the basement, to mom holding the ladder while dad climbs on the roof to hang the lights? These activities are not often considered traditions, but they typically are done the same way every year, and therefore constitute a tradition.

Christmas firsts are always important and fun to scrapbook. For example, baby’s first Christmas, the first Christmas in a new home, or your first Christmas as a couple. Of course, decorating the tree is a tradition in most homes. I gave some scrapbooking ideas for ‘trimming the tree’ in my last blog. You can read it here.

To come up with scrapping ideas of your own, ask yourself, “What is it that our family does every year at Christmas time?” It could be something simple like watching a movie after dinner. Or it could be something very unique. I know a family who hides a special ornament on Christmas Eve, and whoever finds it on Christmas morning gets a special present. Traditions such as these are what make your family unique. Preserve them by creating a scrapbook page, so the tradition can be remembered and passed down through the generations. I like the idea of creating separate Christmas albums. Then they can be placed on the coffee table as part of your Christmas decorations where everyone can enjoy them year after year.

I hope this Christmas season brings you all the hopes and wishes of your heart. Take some time to tell the people in your lives how important they are. As our beloved prophet, President Thomas S. Monson said, "Stresses in our lives come regardless of our circumstances. We must deal with them the best we can. But we should not let them get in the way of what is most important—and what is most important almost always involves the people around us. Often we assume that they must know how much we love them. But we should never assume; we should let them know."

Return to the Neighborhood.

Dec 19, 2008

Trimming the Tree

For years, I've wanted a fancy Christmas tree, with matching ornaments, perfectly placed and not meant for touching. But recently, I look at my small tree, with its twisted branches and all of the homemade ornaments we've collected over the years, and I wouldn't trade it for anything.

Our tree ranges from the fancy ornaments Grandma purchases for each of the children every year, to the homemade bows and gingerbread men we made the first year we bought our tree, but didn't have money to buy ornaments. After all these years, most of the gingerbread men are missing an arm or leg, and the bows have long been smashed and misshapen, but the kids still insist on putting them on the tree.

Since I have a large family, every year I get new ornaments the kids make at school. My favorites are the ones that include their picture on them, that way I can remember which year they were made and which child gave them to me. In fact, the angel on the top of our tree, was made by one of the kids in school. It is made from a paper plate folded in the shape of an angel. Over the years, I've debated about buying a fancy angel for the top, but I can't stand the thought of replacing that paper plate angel.

We also have many ornaments we've made doing the Christmas activity that comes in the Friend magazine each year. There are cutouts of shepherds, sheep, Mary, Joseph, and the Baby Jesus. We have popsicle stick mangers covered with hay, and candy canes made from twisted pipe cleaners.

While trimming the tree, our time is spent listening to the kids saying, remember when . . . or I made this one in 3rd grade . . . and this one I got the year we went to grandmas. Each ornament has a special memory attached to it, and listening to the kids recount them each year is one of the best parts of Christmas.

Now, this blog is supposed to be about scrapbooking. So, here's my idea. This year, as your children recount the story of each ornament, write them down. Take pictures while you trim the tree. You can even take closeups of the ornaments, and then write the story of each one. It will give you something to look back on when your children are no longer around to tell you the stories. It would make a great Christmas gift to give your grown-up children, so they can share it with their own children and say, I remember when . . .

Return to the Neighborhood.

Dec 15, 2008

Gingerbread Houses

If you want a creative and impressive centerpiece during the holidays, nothing is better than a homemade gingerbread house, and they are not as difficult to make as you might think. It's also a great way to get your children involved. Just be sure to buy extra candy, because for every piece that goes on the house, invariably one goes in their mouth as well.

The first thing to decide is what type of house you want to build. You can always use the traditional square house, but don't limit yourself. Pretty much any type of house could be built out of gingerbread. I've seen farmhouses, victorian, and even an igloo. You could even build something other than a house. One year, we built a gingerbread train. It was darling and a fun change of pace.

I found some ready-made templates you could use, or design your own. These are from Bob Vila, the home improvement guru: A-Frame, Colonial, Saltbox, and Side Gable houses. Or here is a simple, traditional square house from AllRecipes.com.

Next, prepare a base for your house. The size of the final structure will determine how sturdy the base needs to be. Keep in mind that you may want to move the house from place to place and pick accordingly. You can use plywood, a cookie sheet, or a sturdy piece of cardboard. Layer several sheets of tinfoil over the base.

There are many recipes for gingerbread available on the internet. I've included one here, but feel free to try a different one:

CLASSIC GINGERBREAD HOUSE RECIPE

1 cup butter, softened
1 cup brown sugar
1-1/3 cups molasses
4 eggs
8 cups all-purpose flour, divided
1 teaspoon baking soda
1 teaspoon salt
1 teaspoon ground allspice
1 teaspoon ground cloves
1 teaspoon ground cinnamon
1 teaspoon ground ginger
2 pounds confectioners' sugar
1 teaspoon cream of tartar
6 egg whites

Directions

1. Preheat oven to 350 degrees F (175 degrees C).
2. In a large bowl, cream together the butter and brown sugar until smooth. Stir in the molasses and eggs. Combine 1 1/2 cups of the flour, baking soda, salt, allspice, cloves, cinnamon, and ginger; beat into the molasses mixture. Gradually stir in the remaining flour by hand to form a stiff dough. Divide dough into 2 pieces.
3. On a lightly floured surface, roll out dough to 1/8 inch thickness. Cut into desired shapes. Place pieces 1 inch apart onto parchment-lined cookie sheets. Refrigerate for 15 minutes. Bake for 8 to 10 minutes in the preheated oven. Cool on baking sheet for 5 minutes before removing to a wire rack to cool completely.

Icing
In a medium bowl, sift together confectioners' sugar and cream of tartar. Blend in egg whites. Using an electric mixer on high speed, beat for about 5 minutes, or until mixture is thick and stiff. Keep covered with a moist cloth and plastic wrap until ready to decorate.

While assembling, keep in mind the following tips:

- Roll dough to 1/8 to 1/4 inch thick. Cut out windows, doors, etc. before baking.
- Allow the gingerbread to cool thoroughly before assembling.
- Adjust the consistency of the icing by adding more egg whites if the icing is too dry or more powdered sugar if it is too wet. It should be thick and stiff.
- Use canned goods from the pantry to stabilize the walls during assembly; remove them before adding the roof.
- Apply icing-glue to the bottom of your pieces for more stability; adhere them to the foil/plywood base.
- Allow 30 minutes for the front, side walls and back of house to dry and firmly set before adding the roof.
- Allow house to dry completely before decorating: a minimum of 4 hours, preferably overnight.
- Apply candy decorations by putting a small dab of icing to the underside of the candy and hold it in place until set.
- If you do not have time to do the baking, you can use cardboard or graham crackers and still show off your decorating skills.

Don't worry if you make a mistake. You can cover gaps and even cracks in the gingerbread with icing and candy. There are tons of fun ideas for decorating. You can use coconut for snow, upside down ice cream cones for trees, pretzel squares for shutters, tootsie rolls for logs, zebra stripes gum for shingles, marshmallows for snowmen, you get the idea. Check out the candy aisle at the grocery store and you'll come up with all sorts of ideas. Don't forget the bulk food bins, so you can buy just a few pieces of many different candies for more variety.

Most of all, have fun! Building a gingerbread house can be a family tradition your children will look forward to and always remember.

Return to the Neighborhood!

Now for a self-indulgent side note:

My daughter went on a blind date on Friday. It was fun watching her get ready and wonder about if her date would be cute and what he was like. When she came home, she said he was kind of shy, but she had fun. They built gingerbread houses and drove around to see Christmas lights. I thought that was a pretty creative date idea for boys to come up with. Here's the house she and her date made. Isn't it cute?

Dec 12, 2008

Easy Neighborhood Christmas Gifts

Well, it's started. Almost every night, the doorbell rings, and some child is at the door with a Christmas treat or present to share with us. I'm not sure where the tradition of giving neighbor gifts began. I wonder if it's an LDS only phenomenon, but nevertheless, when I get gifts from my neighbors, I feel like I need to give a gift in return.

I decided to share some easy, crafty, gift ideas with you. I've picked things that will be easy on your wallet, but are still fun and creative.

For any family who has toddler's, I'm sure you've heard of the game, "Don't Eat Pete". My kids love it. Even my bigger kids play--okay, so maybe they are humoring the smaller ones, but I think secretly they still like it.

Laminate the Don't Eat Pete game. You can get a color or black and white copy here. Attach the Christmas M&M poem, with a bag of M&M's.

Go to the Dollar Store and purchase a small cutting board, oven mitt, and a 6-pack of candy bars. Wrap a ribbon around them and attach the instructions for this fun candy bar game.


Purchase an ornament and then attach a card explaining the legend or meaning behind the symbol. You can find examples here. See the examples of tags below.


Add a baggie of Reindeer Food to the front of a gift as an embellishment.


You can also use Candy Grams which are super easy and fun. Here are a few ideas. Click on this link for tons more!

-Candle: Thanks for letting your light shine.
-Measuring Cups: Wishing you joy beyond measure.
-Bubble Bath: May your holidays bubble over with fun.
-Chocolate Orange: Orange you glad it's Christmas?
-Cookie Dough: Here's a little extra dough this Christmas.

You get the idea. They are kind of corny, but fun. I hope these ideas will help get your imagination started. If you know of a fun idea, I'd love to hear about it. Have a happy holiday!

Return to the Neighborhood.

Dec 6, 2008

Organized Christmas

Well, the season is upon us. No matter what we do, or whether we are ready, Christmas is coming. Lists to make, gifts to buy, cookies to bake, decorations to hang, presents to wrap . . . you know, you've been there. I have to consciously be aware of my state of mind throughout the holiday season, or I quickly find myself slipping to the side of commercialism and leaving the true meaning of Christmas behind.

In my quest for being organized this Christmas, so that I have time for the things that matter most, I found a very cool website you need to check out. It's called Organized Christmas. It has daily tips and inspiration for keeping your Christmas organized and under control.

It also includes ideas to cut the costs of Christmas. Check out the following links for some unique ideas:

Make a holiday budget.
Print a holiday budget planner.
Understand the unwritten rules of gift giving.
Save money on holiday meals.
Beat the holiday grocery game.
Deck the halls with frugal holiday decorations.

It also has a section on Christmas crafts, which includes thing such as gingerbread houses, (including a printable template), gifts in a jar, and a magic elf tradition. You will find a daily holiday tip, and fun things to print, such as gift tags, calendars, poems, and more. There's a Christmas Countdown calendar telling you exactly what you should be doing every day to get things ready. They are simple things like, plan holiday baking, make room for new toys, create a Christmas card list--all things you would likely do anyway, but in an organized system.

Please don't be overwhelmed, thinking you need to use all the ideas available on this website. Remember, the goal is to eliminate some stress, not increase it. I wish you luck, preparing for Christmas. Never forget the real reason we celebrate.

Return to the Neighborhood.

Dec 5, 2008

File Folder Albums

I was looking around on the internet the other day, looking for something new I could share with you. On the Two Peas in a Pod website, I ran across a project which I think is totally ingenious and very cool—File Folder Albums. Be sure to go to the link and check it out. You can look inside the above album and see all the pages. It's totally amazing!

Basically, you take several file folders, 3-hole punch them, and then use the fronts, backs, and insides as your scrapbook pages. The really useful thing is you can also label the pages on the file folder tab that sticks out.

I haven’t made one yet, but I’ve got tons of ideas and can’t wait to get started. It would be perfect for a scrapbooking Calendar. Turn the file folders horizontally. On the inside of each folder, print a simple calendar and attach it to the bottom. Then decorate the inside top with the name of the month and a scrapbooking layout including pictures, journaling, quotes or anything you want.

You could either decorate the outsides of the file folder now or save them for later, decorating them with photos of activities you participated in that month. If you don’t want them plain in the meantime, you could cover them in a patterned paper applicable to the monthly theme, which you will use later for the background of your layout. If you don’t like the Calendar idea, you could still use twelve file folders, label the tabs with each month and just create scrapbook pages for each month of the year.

These would be a super fun activities for kids. They could make them as a memento of the school year, including their favorite artwork and assignments they are particularly proud of. Of course, being a writer, I’d encourage you to include a sample of their writing. It is fun to look back at their handwriting as well as the way they put words together.

Older kids could create one file folder for each of their friends, put their name on the tab, and create layouts about their friend and fun things they’ve done together. As a parent, you can use this same idea and create one tab for each child.

It could become a family tradition. Every year after Christmas, together as a family you could create a file folder for that year’s Christmas, including photos taken, family recipes, Christmas cards you received, etc. Then just write the year on the tab and add it to your album.

This brings up the idea of binding. There are many ways you can bind the file folders together. Since you three hold punched them, you could even put them in a hardback binder that has three rings.

Another possibility is to use metal clasp rings that open and close. There are many s sizes available to allow as many folders together as you’d like. There are many fun metal hinges on the market that can be used, or you could simply use ribbon.

Regardless of the type of binding you decide to use, it’s a good idea to reinforce the holes, so the folders don’t eventually tear through. There are clear round stickers made for reinforcing punched holes available at any office supply store. It also helps to glue your paper down before punching the holes, to give one extra layer of reinforcement.

One other binding option, if you aren't creating a very bulky album is to open all the file folders, lay them on top of one another, and using a sturdy sewing machine, stitch several times up and down the spine of the folders.

I’m going to make one of these during Christmas break. I’ll be sure and post some pictures on my blog.

Return to the Neighborhood.

Dec 2, 2008

I Did It!!

Well, it's done. I finally submitted my first manuscript today. It's scary and exciting all at the same time. I know on my blog it said my goal was to submit in September, but December is kinda close, isn't it?

The manuscript was short about 5,000 words and I struggled to add them. But I think the additions make the story stronger overall, and I'm glad they are there. I also ended up rewriting the first chapter. It originally included a lot of telling, so I revised it to show a dramatic scene rather than tell it. I hope it's enough to make an editor want to read past the first page.

The submission process was rather involved. I spent many hours slaving over the items required. Thanks to Josi Kilpack for her amazing advice on writing a synopsis. I used the information she presented at the 2008 LDStorymakers conference as well as a blog she posted at Writing on the Wall.

So, cross your fingers for me! I'm sure the waiting will kill me. I'm hoping submitting during the holidays won't slow down the process, but it likely will. Thanks to all of my writing friends for your help and especially my amazing critique group!

Here's a little blurb about the book to hopefully get you all excited about reading it:

Stephanie Roberts didn’t realize the day she met Jared Wakefield they had met before. Running from an abusive marriage and trying to safeguard her children, she turns to Jared for support, not realizing he might need more from her than she was capable of giving. With an abusive husband and their own insecurities standing in the way, the difficulties they need to overcome to be together seem insurmountable.

When Stephanie walked out on her husband, she vowed to never look back, but as she begins to rethink her decision, Jared feels as if his life is spiraling out of control. Will Stephanie realize her mistake before it’s too late? Will Jared recognize she’s the one he’s been looking for all along? And, in the end, is it possible for love to conquer all?

“I’ll Know You by Heart” is a timeless romance. It explores the possibility that relationships can span the entire realm of eternity. It is a story about abuse, hardship, betrayal, and ultimately the power of everlasting, true love.


Dec 1, 2008

Altered Art: Clipboards

I've had lots of feedback that people are enjoying the altered art projects I've posted, so I've got another fun one for you today. Did you know you can turn an ordinary clipboard into a work of art and a perfect gift? They make super cool room decorations and are great for simply holding notes.

The first step is to choose a patterned paper or two and then a paint color to match. Lightly sand both sides of the clipboard then paint it using a foam brush. Let it dry well. You can also use crackle compound to give the paint a unique distressed look if you want.

Attach the paper to the clipboard using Mod Podge or another decoupage adhesive. To keep bubbles from forming in the paper, apply a thin coat to the clipboard underneath the paper. Apply the paper then smooth out any bubbles using a flat object, such as a ruler. Add any other flat embellishments you plan to use, the apply a thin coat of Mod Podge over the entire surface of the clipboard and allow it to dry.

Then simply add any three dimensional embellishments, such as metal doo-dads, 3D stickers, paper flowers, buttons, and ribbon, chipboard, etc. There is no limit to how they can be decorated and the many fun uses you can find for them.

Here are a few ideas:

-Decorate only the clipboard and then rotate pictures for variety or change them seasonally.
-Create a Christmas countdown calendar or advent calendar.
-Make a clipboard for a teacher gift. Avoid bulky embellishments so it is still functional.
-Paint with blackboard paint so it can be used as a chalkboard.
-Attach a magnet to the back and hang it on the refrigerator or in a locker.
-Create a Calendar and rotate the picture each month.

As always, the possibilities are endless . . . Have fun!

Return to the Neighborhood.

Nov 29, 2008

100 Things About Me

A tradition here in Blogland dictates that when you reach 100 posts, you list 100 things about yourself. Well, this is my 100th post, so here goes--

My 100 things in no particular order:

1. I was born in October.

2. I grew up in Orem, Utah.

3. I got married when I was 17.

4. I had my first baby when I was 19.

5. The only other state I've lived in was Florida.

6. I lived there for 6 months.

7. I hated all the big bugs!!

8. I was relieved to come back to Utah.

9. I now have 6 kids, 3 girls and 3 boys.

10. My favorite colors are black and pink.

11. I have a Bachelor's degree in Business Management.

12. I own an online retail scrapbooking business.

13. I'm an aspiring LDS Fiction author.

14. I recently finished my first book.

15. I work as a transcriptionist at Brigham Young University.

16. I also work as a Digitial Preservation Specialist at The Generations Network. (Graveyard! Yuk!)

17. I'm almost single! (Long Story.)

18. I recently discovered Facebook and I'm having fun connecting with old friends.

19. I have the most awesome writing critique group ever!

20. I'm also a member of ANWA.

21. I used to trade Foreign Currency. (The market is too scary these days!)

22. I'm the only girl in my family.

23. I have two brothers.

24. I lived in a foster home for a while when I was 15.

25. I love Mexican food.

26. My favorite fruit is raspberries.

27. I love chocolate--the darker the better.

28. I like to cook.

29. I have burping contests with my 11 year old. (Gross! I know.)

30. My kids friends love me. (I'm cool, what can I say?)

31. I love to read.

32. Historical fiction is my favorite.

33. I've tried homeschooling, but found I wasn't very good at it.

34. I broke my elbow when I was 8 months pregnant.

35. I had surgery on it later.

36. I hate dogs!

37. I really hate dogs!

38. Okay, I admit it. Dogs scare me.

39. When I was a kid my mom would hear me screaming and running down the street and know I'd seen a dog. Did I mention don't like dogs?

40. I'm not really fond of any animals.

41. I play the piano.

42. I like to sing, but I'm not that great.

43. I have had up to four kids playing competition soccer at a time and watch TONS of soccer games every year.

44. I drive them to practice too.

45. Sometimes I think I should just paint taxi on the side of my car.

46. I really like to go on cruises.

47. My whole family runs marathons, and I'm determined to run with them someday.

48. I cut my head open falling off the merry-go-round when I was two.

49. If you knew my over-protective mother, you would never believe that could happen.

50. My dad must have been watching me.

51. My dad is my greatest hero.

52. I'm a member of the Church of Jesus Christ of Latter-Day Saints.

53. I didn't go to church between the ages of 13 and 16.

54. I think it's really hard to think of 100 things about myself. :)

55. One of my favorite movies is "Savannah Smiles."

56. I like to keep things organized.

57. I hate to be late.

58. My house isn't always clean.

59. When my house is too clean, I'm ornery because I yell at everyone to keep it that way.

60. So I've decided everyone is happier with a little clutter.

61. I like to cook.

62. But I don't have a lot of time, so we've been eating way too many frozen things lately.

63. I'm determined to do better.

64. On my birthday in October, I promised myself this would be my year to get healthy again.

65. I'm making slow progress--but still--it's progress.

66. I'm stuck in the middle of a story. I think it's called writer's block. Ask my critique group? They'll tell you all about it.

67. I have to write a chapter for this week and I haven't started yet.

68. I spent Thanksgiving without my kids this week and it was sad. :( (The downside of divorce.)

69. But I get them for Christmas. :)

70. I'm intrigued by family history.

71. I'm related to Keith Fisher. We both have the same great, great, great, (not sure how many greats) grandfather. But we came from different plural wives.

72. I didn't graduate from high school with my class.

73. I graduated from the Adult high school after I was married.

74. I had four kids by the time I graduated from college.

75. I blog for yourLDSneighborhood.com.

76. I also write articles for wisegeek.com.

77. I recently got a blogging job with Prevention magazine. (Don't know the details yet.)

78. I also do some independent contract work for Morningside Partners.

79. My minor was in accounting.

80. I actually like doing my taxes.

81. I hate my small business bookkeeping though.

82. I want to learn more about digital scrapbooking.

83. I need to learn more about website design.

84. I love learning new things and learning has always been easy for me.

85. I think 84 counts for two!

86. I like to cook, but I hate doing the dishes afterward.

87. I hate laundry. I think my kids purposely put clean clothes in with the dirty ones.

88. I love it when it rains.

89. I like to curl up with a book when it's cold outside.

90. I love soup and rolls on a snowy day.

91. I love to scrapbook, but I don't have much time.

92. I HATE public speaking.

93. I read fast, and even faster when I'm nervous.

94. I'm shy and sometimes people think I'm just snotty. But I'm really not--just shy.

95. I don't like to take naps during the day. I wake up with a headache.

96. I don't fold socks. We have a laundry basket full of them. My poor kids just have to dig through the basket when they need some. Needless to say, their socks often don't match.

97. I'm really good at spelling.

98. Thanksgiving is my favorite holiday.

99. My kids make life worth living. I'd be lost without them.

100. I'm thankful for all the new friends I've made through blogging! You guys are awesome! Thanks for visiting my blog and including me in your circle.

Nov 28, 2008

Christmas Gift Ideas

I know you won't actually see this posted on yourLDSneighborhood until Monday, but I'm writing it on Black Friday, the day after Thanksgiving, so I've kind of got Christmas on the brain.

Yes, I was crazy enough to go shopping this morning. I didn't come home with any great finds, in fact I didn't buy a single thing. But I did come home feeling a little unsettled. There is so much news around us about the state of the economy and how a lot of people are struggling financially. I was surprised by how many people were out shopping early today, but even more than that (after all I was one of them), I was surprised by the vast quantities of stuff people were purchasing. There were consumers who had three or four shopping carts piled high with toys. Nobody needs that much stuff!

Anyway, I thought today I would give you a few ideas of small, inexpensive Christmas gifts you can make with scrapbooking products. I know most of you have them lying around unused, so you might as well put them to good use.

The first item is a family recipe book. I found this fun idea on Debbie's World blog. You should check it out. She has lots of cute ideas. This book is made by using spiral bound index cards. Decorate the covers with cardstock, stickers, and embellishments. The wire is perfect for tying ribbon on. Then simply, write your recipes inside. You can also add stickers and embellishments to the pages inside as well.

Another fun idea to use products you already have is to create a scrapbook calendar for the new year. You can either buy a calendar to decorate or make your own. I'll give more details in an upcoming blog later this month. Grandparents love these. Especially if you fill in all the birthdays, anniversaries, and other important events for them. It's a great way to showcase your favorite pictures taken throughout the year.

You could also create a Thank You/Love You box. We did this for Thanksgiving this year, but it would also be a great Christmas gift. Purchase a box (we found one at the dollar store), or decorate your own. Then make small cards out of cardstock. You can decorate each one with a sticker or embellishment. We simply used paper flowers with a brad through the center of them. Then have all of your family members write a note to whomever the gift is for. Put them in the box. This is a very simple, inexpensive gift that will be treasured forever.

My hope for you is that you and your families can make this Christmas a simple, yet memorable one, focused on the true meaning of Christmas. Hopefully some of these ideas might help.

Return to the Neighborhood.

Nov 24, 2008

Be Thankful

I just came home from taking my daughter to a friends house. We took an unusual route and my daughter complained it was taking too long and questioned my decision to go that way. On the way home, I came back by the way we would have usually gone. There was a bad accident which delayed traffic for several miles.

Now, I'm not saying had we gone the way we usually go that we would have been involved in the accident, but it likely occurred at about the time we would have been passing by. Somehow, seeing someone else's suffering causes us to reflect on our own blessings.

With the approach of the Thanksgiving holiday, my thoughts have turned to things I have to be grateful for. I know this blog is departing from my usual subject, but since it will be posted on yourLDSneighborhood on Thanksgiving day, I thought I would take a little bit different approach. I appreciate your patience with my self-indulgence.

It’s been a difficult year for me, but as I look back, I realize I have much to be thankful for. My sweet children have stood by my side as I made choices that have affected their lives as much as my own. I appreciate their never ending support. My parents have stepped up and helped with things I’ve been unable to do for myself and I’ll be forever grateful.

I’m thankful for my association with Candace and the other people at yourLDSneighborhood. I appreciate the opportunity it has given me to develop my talents and share them with others. The growth I’ve experienced in the process is immeasurable.

My writing group deserves a big thank you as well. They push me to be better and support me in all aspects of my life. I couldn’t ask for a better group of friends. They’ve lifted me in ways they will never know. Thanks guys! I also have a few special friends, whom without their support, I would have completely fallen apart--you know who you are. Words cannot express what you have done for me this year. All I can say is thank you.

And I can’t forget my Father in Heaven. He unfailingly supports me in all I do. Even when I falter, he’s always there to pick me up, helps to dust me off and gives me a nudge in the right direction.

Take time this week to express thanks to those around you and your Heavenly Father for all the blessings in your life. It’s a hard world we live in and there are things going on around all of us that seem tough at times. With the love and support of loved ones you can make it through.

And don’t forget, the whole purpose of scrapbooking is to document and preserve precious memories to share with your loved ones now and future generations to come. Thanksgiving is the perfect time to create an album of thanks. Take pictures of all the things you are thankful for and create a small album. It will be fun to look back on and will help you realize you have an awful lot to be thankful for.

Return to the Neighborhood.

Nov 21, 2008

Thanksgiving Memories

I can’t believe Thanksgiving is almost here. It seems like school just started. Because of changes in my life situation, I’ve been working. I’m amazed at how the time seems to fly by when life is dictated by someone else’s clock.

Thanksgiving has always been one of my favorite holidays. You get the feeling of family togetherness, without the busyness Christmas brings. I remember when I was young and we would all gather at my Aunt’s house and I’d play with cousins all day. Eventually, as we grew up and started having children of our own, the group got too large and we started meeting with only our own family. I miss the days of gathering with relatives I don’t see as often.

When I was a teenager, I hated the time before dinner when we’d go around the table and say something we were grateful for. It invariably brought tears to my eyes which at that time I was too proud to show very often. I wish I had photographs to look back on those happy times, but I don’t so they will have to live on in my memory.

This Thanksgiving, take the opportunity to create memories you will never forget, but also remember to document them through photographs, journaling, and even scrapbook pages for future generations to look back on and enjoy.

Here are a few Thanksgiving scrapbooking ideas to get your imagination started. Look through them and plan now how you will save the memories of this special day.

-Pictures while preparing the meal or carving the turkey.
-Pictures of people watching football and the children playing.
-New members of the family – babies or in-laws.
-Traditional family recipes.
-List of things you are thankful for.
-Have those present sign a slip of paper with what they are thankful for and include them on your page.

Thanksgiving Page Title Ideas:
Count Your Blessings
Friends, Family, Food and FOOTBALL!
Turkey Time
Gobble ‘til you Wobble
What a Bunch of Turkeys

Have a happy holiday! Return to the Neighborhood.

Nov 17, 2008

A Stitch in Time

Sewing? On paper? Yes! Sewing can be used for a variety of reasons on your pages including to hold items down, to add a decorative border or just for embellishment. Sewing on paper adds texture to your scrapbook pages and is lots of fun!

At first, sewing on paper may seem difficult. It isn’t quite as forgiving as fabric. If you make a mistake, you generally just have to start over because after removing thread, holes will be in the paper. Once you get the hang of it, I’m sure it will become one of your favorite techniques.

It helps to lightly draw a line with a pencil to guide your stitching. It’s a good idea to use heavier threads because they will show up better on your project. You can machine stitch using a regular sewing machine or one specially made for scrapbooking and other paper crafting projects. Provo Craft has a small portable Sew-Easy machine which retails for $12.99. It isn’t heavy duty, by any means, but works well for sewing paper.

Another fun technique is cross-stitching. To make it show up, use several strands of embroidery floss. It helps to mark and pre-punch the holes with a paper piercer or a large needle. You can also use other types of materials for sewing; yarns, silk ribbon, or even fibers are all possibilities. Don’t forget decorative machine stitching. Most sewing machines, even basic models, have a variety of stitch patterns. Get out a piece of cardstock and try them out. You’ll be amazed with the zing they can add to your pages. Since there are about a million different thread colors, it’s really easy to get just the right color to go with your patterned paper.

Here’s a few ideas you can try:
· Add a stitched border on a card or scrapbook page.
· Include decorative stitching across a length of ribbon or twill tape.
· Stitch to create a photo frame.
· Use stitching to create a pocket out of fabric or paper.
· Attach an embellishment or decorative item to your project

If you like the look of sewing on your layouts, but are too intimidated to try, there are a lot of products on the market including stamps and rub-ons which make your layouts look like they’ve been sewn.

I hope you’ll try some of these fun and easy techniques. One last hint is that it’s always best to adhere your paper or fabric to the cardstock before you start to sew so that it doesn’t slide around.

Return to the Neighborhood.

Nov 14, 2008

Framed Layouts

Do you remember when you first started scrapbooking? If your initial attempts at scrapbooking are anything like mine, you probably want to leave those pages in the archives. I’ve been tempted to redo them more than once. But the task seems too daunting and I can’t justify redoing pages already done and in albums when I have boxes full of pictures still waiting to find a home.

Scrapbookers spend hours creating amazing layouts, but then hide their works of art in the deep recesses of bulging scrapbooks. A recent trend—framing—helps you enjoy your layouts today, rather just putting them away for future generations.

Creating pages for framing is not much different from creating pages for a book. If anything, it’s even more fun. You’ll showcase your scrapbooking skills and decorate the house while you’re at it!

Creating layouts designed specifically for wall display adds a whole new dimension. You are no longer limited to the size and shape of a scrapbook. You could make huge poster-sized pages, oval and round pages, long thin rectangle pages . . . you get the picture. Any size or shape of frame can be turned into a scrapbook layout.

Often, framing allows you more depth to utilize bulky embellishments or memorabilia you wouldn’t include in a scrapbook. For example, the layout on the right includes a baby page you might see in any regular scrapbook, but because it’s in a deep frame, the knitted hat the baby wore in the hospital is also included.

Shop around for unique and unusual frames. Practically any frame can be turned into a scrapbooking layout. Check junk stores, department stores, garage sales, and even the dollar store.

Select a frame, and then picture where you want it to hang in your house. You can even decorate the frame and the page to match the surroundings. Check out my altered frames articles for some ideas. Don’t limit yourself!

Start today by seeing if you have any old frames lying around. Frames are also available in all standard scrapbook sizes from 6x6, up to 12x12. You can usually find them right alongside the scrapbooks in your local craft or scrapbook supply store.

Return to the Neighborhood.

Nov 11, 2008

Happily Ever After

I admit it. I'm a sucker for a good romance. I want the hero and heroine, boy and girl, frog and princess to get together. I knew I was in trouble last week at my critique group when Tristi prefaced her comments about my most recent chapter with something like, "Remember, I love whom I chasteneth." Then she went on to tell me that the romantic scenes I'd written were coming too fast and too soon in the story

I can honestly say I knew this when I was writing it. I'm working on a new book and it's been a struggle. I have a man and woman trapped in a remote mountain cabin for several weeks. I'm trying to come up with ideas of things they can do, or things that can happen during this time. There's only so much you can do in a two-room cabin. Any and all ideas are welcome? (As long as they are clean!) Please send them my way.

It's actually very motivating to receive feedback and suggestions on my writing. I come away from our critique group every week having learned something new and a better writer because of it. We have way too much fun discussing plot holes, scenes that won't quite work, points of view, doctrines of the gospel, and in my case just plain old trying to rush things. (Did that about sum up last week's meeting?) Thanks guys! I'd be lost without you.

Tristi, Heather, Danyelle, Keith, Me, and Nichole


And Tristi, thanks for reminding me that happily ever after doesn't come in the middle of the story!

Nov 10, 2008

Stamping Basics

I have always loved the effect of stamped images on scrapbook pages. But I didn’t want to learn how to use them because I thought it would just be another trend that would start to fade as soon as I invested the money in it. Once I learned how to use them, I wondered why I’d put it off for so long. Rubber Stamping has been around a long time and is here to stay because of its uniqueness and versatility.

You can use stamps to create distinctive titles and journaling. You can also embellish your pages as well as create fun backgrounds to accent your photos. Once you discover the varied uses for stamps, you’re sure to fall in love with them.

There are tons of stamping products available, but you can start out with just a few of the basics. Choose stamps you know you will use on more than one project. The most useful stamps are alphabets, geometric shapes, background stamps, and phrases you know you’ll use over and over such as “Happy Birthday!”

One of the easiest ways to use stamps is to create background paper. Stamp one image or several images repeatedly to get the look you want. Try using white ink on dark paper for an impressive look. Use Alphabet stamps to create titles or to stamp individual words you want to stand out in your journaling.

Be sure to stamp on a hard, even surface. Hold the stamp securely and don’t rock it from side to side as you apply pressure or your image will be blurry. Instead, press the stamp down firmly to ensure all areas of the image receive the same amount of pressure. Always let the image dry before you touch it.

As an alternative to ink pads you can use markers and color right on the stamp. This makes it easy to use varying colors on the same image. Or simply stamp the image in a solid color and then use markers, colored pencils, or chalk to color in the image.

The easiest way to clean your stamps is to use alcohol-free baby wipes. Another option is a 1:1 ratio of water and window cleaner. Spray it on a folded paper towel and then stamp on the wet surface until all ink is removed.

I hope these simple tips make the idea of using rubber stamps less daunting. Experiment with them. They are ideal for all sorts of projects: handmade cards, gift bags and tags, wrapping paper, bookmarks, gift books, scrapbook pages and more.


Return to the Neighborhood.

Nov 7, 2008

Altered Art: CD's


I’ve gotten lots of positive feedback from the other altered art articles I’ve written, so I guess I’ll keep them coming. Today we are talking about altering CD’s. You all have old disks lying around. Sometimes they come in the mail, others just stop working. Well, there’s no reason to throw them away. Instead, turn them into a work of art. There are a million ways to alter a CD. Here are a few examples of what you can make by altering a CD:

• Make Christmas ornaments for your friends and family. They'll love the fact that they're homemade and you'll love the fact that they're cheaper than the alternative!
• Add pictures of your family or friends for a very unique picture frame.
• Send an altered CD as an alternative to the traditional greeting card.
• Create a CD and attach it to your next housewarming gift as an unusual and beautiful tag.
• Combine several altered CD’s to make a unique photo album.
• Don't be afraid to decorate the CD case, as well, for the whole package. This makes a VERY impressive gift.

Have fun and be creative. And don’t worry—you won’t mess it up. Altering by nature is out-of-the-box and funky. I think you'll quickly realize just how addicting these things can get!

Return to the Neighborhood!

Nov 3, 2008

Organization Tips: Paper Scraps

Patterned paper, cardstock, stickers, die-cuts, brads, buttons, flowers, chipboard, tools, and the list goes on and on. Most scrappers have a huge stash of supplies. If you are like me, you buy supplies faster than you can use them. So, how do you organize all of these items? I know if I don’t have my supplies organized, I forget what I have, I cannot find what I want when I need it, I get frustrated and then decide it’s easier just not to do it.

Organizing all your supplies is a big project. I suggest doing it in baby steps, organizing one item at a time. Before you know it, you’ll have everything organized and be ready to scrap. First of all, decide what bugs you the most. For me it’s paper scraps. So today, I’m talking about scraps. I’ll give you some ideas of what’s worked for me. If they work for you, great! If not, or if you have an even better idea, please share it with me. I love new ideas and I’m sure some of yours are better than mine.

Organizing Scrap Paper

Every scrapper has scraps of patterned paper and cardstock. It’s hard to throw them away, but unless they are somewhat organized, you’ll never be able to find what you need and the scrap pile will just keep growing and growing. What should you do with them? What size is okay to throw away? How do you organize them? Read on for a few ideas.

First, I purchased an expandable storage case made for storing 12x12” paper. I keep a 12x12” sheet protector in each pocket, with the open side up so I can slip scraps in. This helps me quickly pull out an entire section to look through, without making a mess.

First, I separate cardstock from patterned paper. I don’t sort the cardstock. I just throw it all in a plastic bin set aside for cardstock scraps. It’s fairly easy to look through and find the color you need. Next , I separate my patterned paper scraps by color. Then I file each color in alphabetical order. It is very simple and easy to find what I need when I want to use scraps.

As a general rule of thumb, I keep any scrap over an inch wide. I use them for everything: die-cuts, accenting cards and layouts, matting photos, and journaling.

I also have a second plastic bin where I put scraps I know I won't use. This is for the kids. They love having their own scraps that they don't have to ask permission to use.

I’ll have a series of organization blogs coming up to help you get your scrap space organized. In the meantime, sort those scraps and come back soon!

Return to the Neighborhood.

Nov 1, 2008

Book Review and a Contest

My friend, Anne Bradshaw, wrote a fantastic book review for Heather Moore's new novel, "Abinadi." Her review made me excited to read it.

Click here to read the review and details about how to win a copy of the book.

Oct 31, 2008

Getting Published

I know all of my writer friends might see the title of this blog and think I'm talking about writing, but not this time. I'm talking about getting your scrapbooking layouts published. Did you know it was even a possibility? Where do you think all those scrapbooking magazines out there get all the fun pictures included in their articles? That's right, from plain old people like you and me.

Submitting your layouts for publication for the first time can be intimidating. Though we may never know exactly what magazines are looking for, following a few guidelines can help make the process easier, and hopefully lead to publication success.

Well designed layouts with unusual photos and creative journaling have a greater chance of getting published. Magazines also like layouts that present ordinary events in an extraordinary or unique way.

Keep in mind that most magazines work six months ahead so if you have a Christmas layout, consider submitting it during the summer. Most publications have a list of layouts they are looking for on their websites. Many also have contests listed, the winners of which get published. Here are some sources for you to check out:


Creating Keepsakes

Scrapbook Trends
Scrapbook Trends also lists the type of pages they are seeking for future publications inside each issue of the magazine.

Scrapbooking.com

Make sure you keep track of all the materials you use in a layout. Some magazines want a list with your submission and some will request it later, but they all want it. It's also helpful if you can describe any unusual techniques you used to create your layout. And of course, if you are a writer, like me, you can even write an article to go along with it.

Good luck! Have fun submitting and be sure to let me know if you get published.

Return to the Neighborhood

Oct 27, 2008

Happy Halloween

Double double, toil and trouble;
Fire burn and cauldron bubble.
~William Shakespeare


You can definitely feel fall in the air. It's one of my favorite times of year. I love the cool crisp mornings, leaves changing colors, and the chance to pull out all my long sleeve clothes I put away in the spring. Halloween is probably my favorite event to scrapbook. There are tons of bright fun embellishments and unique patterned papers. I've even been guilty of dressing my kids in costumes to match a particular page layout I had in mind.

You can't go wrong with the traditional orange and black for Halloween. Spider webs and jack-o-lanterns will never go out of style, but don't overlook other Halloween ideas.

Silver, gray, black, blue, and white can convey a sense of mystery, of light in darkness. Black and white pictures are ideal for this sort of layout, but even color pictures of kids in costumes can benefit from these more mystical themes.

The beautiful fall colors of gold, brown, burgundy, red, and deep forest greens can show that the earth is turning away from the vivid colors of summer into colors more suited to short, cold days, and long cozy nights. Halloween is a symbol for this transition, and either of those color schemes can illustrate that transition.

Below I've listed a few prompts to get you thinking of Halloween page ideas you may not have considered:

  • A list of the treats you gave out.
  • Pictures while decorating for Halloween.
  • Pumpkin carving pictures.
  • Sneaking fall treats to the neighbors.
  • Halloween party invitations you sent.
  • Wrappers from your favorite treats.
  • Recipe and pictures of your favorite traditional Halloween dinner.

    I thought I'd share the recipe with you that we make every Halloween. It's fun, because it's served in a pumpkin.

    Meal-in-a-Pumpkin

    1 Onion
    1 ½ lbs. Hamburger
    2 T. Soy Sauce
    2 T. Brown Sugar
    1 Can Mushrooms
    1 Can Cream of Chicken Soup
    1 Cup Cooked Rice
    1 Can Water Chestnuts
    1 Medium Sized Sugar Pumpkin

    Brown hamburger and onion together. Add the rest of the indredients. Spoon into a pumpkin that has been cleaned out. Be sure to save the lid to put back on. Bake for one hour at 350 degrees. Sometimes bigger pumpkins will take longer. If the pumpkin is small enough and you don't have an hour to bake it, you can partially cook the pumpkin in the microwave before filling it. Serve straight from the pumpkin scooping the pumpkin flesh out with the casserole.

    Another fun idea for your scrapbook pages is to use Halloween quotes, poems, or phrases to add titles or journaling. Here are a few ideas for page titles:


    Spooktacular
    Bootiful
    Too Cute to Spook
    Eat, Drink, and Be Scary
    Ghosts Night Out
    I Want My Mummy
    Our Little Pumpkin
    Cutest Pumpkin in the Patch

    Have a fun and safe Halloween. If you create a fun Halloween layout, send them to me and I'll post them on my blog

    Return to the Neighborhood.

  • Oct 24, 2008

    All About Rub-ons

    I often feel like some products aren’t worth the time that it takes to actually use them on my pages. Eyelets are the main thing that come to mind. Too much work for me so I just use Pebbles eyelet brads which give you the look of eyelets without all the work. I used to feel the same way about rub-ons. I could never get them to stick to the paper, or I accidentally moved and got them in the wrong place. But with a little practice, rub-ons have become one of my favorite embellishments.

    What are they? Rub-ons come in all shapes, sizes, and colors. (See sample below.) They’re sticky on the back side (like a sticker), but they’re applied with a stylus or a popsicle stick. The most popular form of rub-ons are letters. The first company to make rub-ons popular was Making Memories, but almost every major player in the scrapbooking business is now coming out with their own rub-on alphabet. Often times, you can’t even tell the difference between a rub-on and a handwritten title because they are so flat.
    Rub-ons can be used anytime! They are often used as a title instead of alphabet stickers, but they can be used as an embellishment as well. They make great monograms and since you can transfer them onto almost anything, they allow you to truly customize your embellishments. Keep in mind that once a rub-on is down, it's really hard to get up, so if you make a mistake you'll just have to cover it with something else.
    At this point in my scrapbooking, I prefer rub-ons to stickers and I know, if you give them a try, you’ll feel the same way. After a little practice with that popsicle stick, you’ll be using rub-ons like a pro!

    Return to the Neighborhood!

    Oct 20, 2008

    Money Saving Strategies

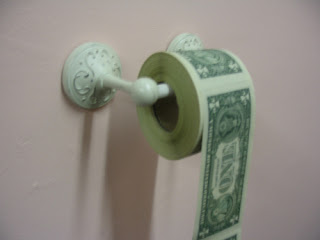
    Do you ever feel like you're throwing money down the toilet? Let's face it! Scrapbooking can be expensive. From the patterned paper, to bulky embellishments, the cost quickly adds up. Need some money-saving strategies? I have a few for you to consider:

    Get Organized - If you're like me, you have so many scrapbooking products sitting around that you're not even sure what you really have. Most scrapbookers are stunned to see what they already own when they get organized. Take an inventory of what you already have. In a future blog, I'll talk about how to get organized.

    Buy in bulk - Buy a multipack of cardstock in the colors you use most often, or split a patterned paper pack with a friend. You can use background paper from a multipack throughout a whole album and spend your money on embellishments to make the pages look different. When you purchase paper by the sheet for each layout, the cost adds up quickly.

    Think simple - Cardstock is generally cheaper than patterned paper. Use cardstock as the background on a two-page layout and use only one sheet of patterned paper (or even better, scraps) to accent your pages.

    Plan ahead - If you are going to a crop, make sure to plan ahead. Decide which pages you'll be working on, then look through the products you already have. this helps avoid impulse buying when you see all the fun products available to purchase. It's harder to justify buying that cute embellishment when you know you already have something ready to use.

    Have a creative eye - Look around you and keep your eye open for embellishments. You can find unique embellishments in everyday objects such as staples, clips, pins, buttons etc. Check your junk drawer or sewing basket. With a creative eye you'll see amazing finds that would be expensive to purchase.

    Invest in good tools - When it comes to tools, sometimes it's better to spend a little more upfront and get a quality tool that will last. Black pens, hole punches, paper trimmers, and scissors are a few of the essentials that come to mind.

    Create your own - When it comes to titles, we often spend lots of money using letter stickers and premade wording such as rub-ons, 3D embellishments, etc. You can save money by creating your own with stamps, computer fonts, or handcut lettering.

    Recycle - If you find you have many items you don't want or will no longer use, recycle them. Many scrapbooking boards have swaps where you can trade your unused items for someone else's. Often getting something new will trigger your creativity. You could also sell unwanted items on eBay and earn money to purchase something new.

    And the best tip, just stay away from the store. If you're like me and you see it, you want it. It's easy to be tempted by the latest toy or gadget, but most things you really can do without. Check back soon for a blog on how to take inventory of the supplies you already have and ideas on how to get organized in the process.

    Return to the Neighborhood.
    Related Posts Plugin for WordPress, Blogger...