Oct 31, 2008

Getting Published

I know all of my writer friends might see the title of this blog and think I'm talking about writing, but not this time. I'm talking about getting your scrapbooking layouts published. Did you know it was even a possibility? Where do you think all those scrapbooking magazines out there get all the fun pictures included in their articles? That's right, from plain old people like you and me.

Submitting your layouts for publication for the first time can be intimidating. Though we may never know exactly what magazines are looking for, following a few guidelines can help make the process easier, and hopefully lead to publication success.

Well designed layouts with unusual photos and creative journaling have a greater chance of getting published. Magazines also like layouts that present ordinary events in an extraordinary or unique way.

Keep in mind that most magazines work six months ahead so if you have a Christmas layout, consider submitting it during the summer. Most publications have a list of layouts they are looking for on their websites. Many also have contests listed, the winners of which get published. Here are some sources for you to check out:


Creating Keepsakes

Scrapbook Trends
Scrapbook Trends also lists the type of pages they are seeking for future publications inside each issue of the magazine.

Scrapbooking.com

Make sure you keep track of all the materials you use in a layout. Some magazines want a list with your submission and some will request it later, but they all want it. It's also helpful if you can describe any unusual techniques you used to create your layout. And of course, if you are a writer, like me, you can even write an article to go along with it.

Good luck! Have fun submitting and be sure to let me know if you get published.

Return to the Neighborhood

Oct 27, 2008

Happy Halloween

Double double, toil and trouble;
Fire burn and cauldron bubble.
~William Shakespeare


You can definitely feel fall in the air. It's one of my favorite times of year. I love the cool crisp mornings, leaves changing colors, and the chance to pull out all my long sleeve clothes I put away in the spring. Halloween is probably my favorite event to scrapbook. There are tons of bright fun embellishments and unique patterned papers. I've even been guilty of dressing my kids in costumes to match a particular page layout I had in mind.

You can't go wrong with the traditional orange and black for Halloween. Spider webs and jack-o-lanterns will never go out of style, but don't overlook other Halloween ideas.

Silver, gray, black, blue, and white can convey a sense of mystery, of light in darkness. Black and white pictures are ideal for this sort of layout, but even color pictures of kids in costumes can benefit from these more mystical themes.

The beautiful fall colors of gold, brown, burgundy, red, and deep forest greens can show that the earth is turning away from the vivid colors of summer into colors more suited to short, cold days, and long cozy nights. Halloween is a symbol for this transition, and either of those color schemes can illustrate that transition.

Below I've listed a few prompts to get you thinking of Halloween page ideas you may not have considered:

  • A list of the treats you gave out.
  • Pictures while decorating for Halloween.
  • Pumpkin carving pictures.
  • Sneaking fall treats to the neighbors.
  • Halloween party invitations you sent.
  • Wrappers from your favorite treats.
  • Recipe and pictures of your favorite traditional Halloween dinner.

    I thought I'd share the recipe with you that we make every Halloween. It's fun, because it's served in a pumpkin.

    Meal-in-a-Pumpkin

    1 Onion
    1 ½ lbs. Hamburger
    2 T. Soy Sauce
    2 T. Brown Sugar
    1 Can Mushrooms
    1 Can Cream of Chicken Soup
    1 Cup Cooked Rice
    1 Can Water Chestnuts
    1 Medium Sized Sugar Pumpkin

    Brown hamburger and onion together. Add the rest of the indredients. Spoon into a pumpkin that has been cleaned out. Be sure to save the lid to put back on. Bake for one hour at 350 degrees. Sometimes bigger pumpkins will take longer. If the pumpkin is small enough and you don't have an hour to bake it, you can partially cook the pumpkin in the microwave before filling it. Serve straight from the pumpkin scooping the pumpkin flesh out with the casserole.

    Another fun idea for your scrapbook pages is to use Halloween quotes, poems, or phrases to add titles or journaling. Here are a few ideas for page titles:


    Spooktacular
    Bootiful
    Too Cute to Spook
    Eat, Drink, and Be Scary
    Ghosts Night Out
    I Want My Mummy
    Our Little Pumpkin
    Cutest Pumpkin in the Patch

    Have a fun and safe Halloween. If you create a fun Halloween layout, send them to me and I'll post them on my blog

    Return to the Neighborhood.

  • Oct 24, 2008

    All About Rub-ons

    I often feel like some products aren’t worth the time that it takes to actually use them on my pages. Eyelets are the main thing that come to mind. Too much work for me so I just use Pebbles eyelet brads which give you the look of eyelets without all the work. I used to feel the same way about rub-ons. I could never get them to stick to the paper, or I accidentally moved and got them in the wrong place. But with a little practice, rub-ons have become one of my favorite embellishments.

    What are they? Rub-ons come in all shapes, sizes, and colors. (See sample below.) They’re sticky on the back side (like a sticker), but they’re applied with a stylus or a popsicle stick. The most popular form of rub-ons are letters. The first company to make rub-ons popular was Making Memories, but almost every major player in the scrapbooking business is now coming out with their own rub-on alphabet. Often times, you can’t even tell the difference between a rub-on and a handwritten title because they are so flat.
    Rub-ons can be used anytime! They are often used as a title instead of alphabet stickers, but they can be used as an embellishment as well. They make great monograms and since you can transfer them onto almost anything, they allow you to truly customize your embellishments. Keep in mind that once a rub-on is down, it's really hard to get up, so if you make a mistake you'll just have to cover it with something else.
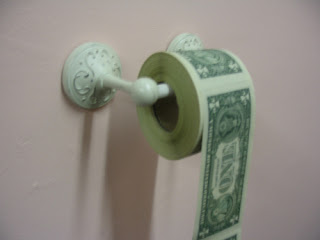
    At this point in my scrapbooking, I prefer rub-ons to stickers and I know, if you give them a try, you’ll feel the same way. After a little practice with that popsicle stick, you’ll be using rub-ons like a pro!

    Return to the Neighborhood!

    Oct 20, 2008

    Money Saving Strategies

    Do you ever feel like you're throwing money down the toilet? Let's face it! Scrapbooking can be expensive. From the patterned paper, to bulky embellishments, the cost quickly adds up. Need some money-saving strategies? I have a few for you to consider:

    Get Organized - If you're like me, you have so many scrapbooking products sitting around that you're not even sure what you really have. Most scrapbookers are stunned to see what they already own when they get organized. Take an inventory of what you already have. In a future blog, I'll talk about how to get organized.

    Buy in bulk - Buy a multipack of cardstock in the colors you use most often, or split a patterned paper pack with a friend. You can use background paper from a multipack throughout a whole album and spend your money on embellishments to make the pages look different. When you purchase paper by the sheet for each layout, the cost adds up quickly.

    Think simple - Cardstock is generally cheaper than patterned paper. Use cardstock as the background on a two-page layout and use only one sheet of patterned paper (or even better, scraps) to accent your pages.

    Plan ahead - If you are going to a crop, make sure to plan ahead. Decide which pages you'll be working on, then look through the products you already have. this helps avoid impulse buying when you see all the fun products available to purchase. It's harder to justify buying that cute embellishment when you know you already have something ready to use.

    Have a creative eye - Look around you and keep your eye open for embellishments. You can find unique embellishments in everyday objects such as staples, clips, pins, buttons etc. Check your junk drawer or sewing basket. With a creative eye you'll see amazing finds that would be expensive to purchase.

    Invest in good tools - When it comes to tools, sometimes it's better to spend a little more upfront and get a quality tool that will last. Black pens, hole punches, paper trimmers, and scissors are a few of the essentials that come to mind.

    Create your own - When it comes to titles, we often spend lots of money using letter stickers and premade wording such as rub-ons, 3D embellishments, etc. You can save money by creating your own with stamps, computer fonts, or handcut lettering.

    Recycle - If you find you have many items you don't want or will no longer use, recycle them. Many scrapbooking boards have swaps where you can trade your unused items for someone else's. Often getting something new will trigger your creativity. You could also sell unwanted items on eBay and earn money to purchase something new.

    And the best tip, just stay away from the store. If you're like me and you see it, you want it. It's easy to be tempted by the latest toy or gadget, but most things you really can do without. Check back soon for a blog on how to take inventory of the supplies you already have and ideas on how to get organized in the process.

    Return to the Neighborhood.

    Oct 15, 2008

    A Page without Pictures

    Can you imagine a scrapbook page without pictures? You can't plan for every possible experience you wish to capture on film. Sometimes moments happen that are worth recording even though you don't have your camera with you.

    We get stuck when we think that every scrapbook page has to have photos. You can record memories in other ways. Here are some techniques for scrapbooking your memories when photographs aren't available.

    Use Memorabilia - You can create an entire layout around a piece of memorablia. Use things such as ticket stubs, restaurant menus, pressed flowers, receipts, artwork, postcards, etc. Highlight the piece of memorabilia on your page and then be sure to add journaling to explain why the item is important and details about the event it represents.

    I've scrapbooked letters and artwork from my children by creating a page pocket to put them in and then journaled details about when I received the note, who it was from, and how it made me feel.

    Use Embellishments - Scrapbooking manufacturers have created embellishments for almost every situation imaginable. Look through your supplies or visit a craft store. It's likely you'll find just the item you need to share your story.

    Use Printed/Scanned Images - You can print or scan images of things which apply to your page. A favorite layout I saw was the story about a couple's special song. Included on the layout was a scanned image of the CD cover. You can use the same idea with movies, plays, etc.

    Don't leave a special memory out of your scrapbook just because you don't have a photo to add to a layout. Remember, it's the story of life you are preserving, not just pictures.

    Return to the Neighborhood.

    Oct 13, 2008

    Altered Art: Picture Frames

    Creating Altered Art picture frames is a great way to use up patterned scrapbook paper and miscellaneous embellishments leftover from other projects. The fabulous thing about altering your own frames is you can match your decor, or the theme of your picture.

    The first thing you need to consider is the type of frame. Choose frames with a nice flat surface so it's easier to adhere the paper. I generally use wood frames, but you can use any type. If your frame has a slick surface, just rough it up with some sandpaper to create a more adhesive surface.

    Follow these easy steps to cover your frame:

    1) Place the paper patterned side down, then lay the frame face down on top of the paper. Trace around the frame opening and outside edges.

    2) Use Scissors to cut frame shape from paper. It's better to leave a little extra paper. We'll use sandpaper later to trim it down.

    3) Use a foam paintbrush to apply an even coat of Mod Podge to the front of the frame.

    4) Place paper onto Mod Podged frame. Smooth away bubbles with fingers.

    5) If necessary, trim the edges of paper as close as possible to the edge of the frame, then use sandpaper to sand the remaining rough or uneven edges.

    6) With the foam brush, apply a thin layer of Mod Podge. Be sure to get along the edges of the paper.

    7) If desired, you can paint the back and edges of the frame in a coordinating color.

    8) Embellish the frame with ribbon, metal embellishments, flowers, stickers, rubons, stamps, etc. This is the fun part. Use your imagination!

    The frame on the right was created by painting the frame white first and then cutting out small squares of coordinating papers and laying them in a pattern on the frame.

    You can use these same techniques to cover any solid object. Covering wooden letters is a popular, fun way to decorate your child's room.

    Use your imagination. You can create unique frames that make perfect gifts. It's even simple enough for children to do and makes a great Christmas gift for Grandpa & Grandma.

    Return to the Neighborhood.

    Oct 10, 2008

    Sharing Photos

    The real joy in taking photos is sharing them. Thanks to technology you now have a bigger audience to share them with. You can publish them on your website, use an online album, or simply email them.

    WEBSITES AND ONLINE ALBUMS

    Gone are the days of printing every single photo you take. Generally, you may print your favorites, but it's fun to have a place to post the rest of the pictures to share with your friends and family. If you have your own website you can create a page and post your pictures there. Another great option is to use one of the popular photo sharing websites. There are tons of them out there. Most are free, but some charge a nominal fee. Check out some of the most popular ones: Photobucket, Webshots, Shutterfly, and Flickr.

    These sites make photo sharing easy. You can upload photos from your home computer, the web, and even from your cell phone. After uploading your photos to an album, you can send the link to friends and family members to view online with just a click of a button.

    Most of the sites also offer photo printing service where you can order photos from your computer and have them mailed to your home. It's all easy and convenient.


    EMAIL

    Of course, an easy way to share pictures if you only want to share a few is through email. You may be able to view images in JPG, TIF, BMP and other formats, but when you are sending pictures through email, don't assume your recipients can. It's generally safe to use JPG format because most computers are capable of opening this type of file.

    JPG files are saved in a compressed format, which means the same photo in JPG format is smaller than in BMP format. If you're really trying to limit file size, you can save a JPG with varying degrees of compression. You can also reduce the file size by reducing the dimensions of the image. For instance, if you're sending an image which measures 1024 by 768 pixels to someone who always uses 640 by 480 resolution, create a copy of the image in the smaller size and send that.

    If you must send a photo in a format such as BMP or TIF, use a zipping program to compress the file first. It's also useful to zip files when you want to send multiple images in one e-mail. Just make sure your recipient knows how to handle zip files.

    For detailed step-by-step instructions from Microsoft, click here.

    I love the fact that digital photography allows me to experiment. Even novice photographers come up with some amazing photos and sharing them is half the fun. Check out some of the websites listed above. I think you'll like them.

    Return to the Neighborhood.

    Oct 6, 2008

    Traditions

    Did you absolutely love conference? I think I like fall conference the most. It has something to do with the air getting cooler, the leaves changing color, and the fact that school has recently started and our lives are still on schedule. By the time April conference comes around, we are madly trying to finish end-of-the-year school projects and still getting over the winter blahs.

    Our family has conference traditions that help make it a special occasion. We started the morning out with chocolate chip waffles with strawberries and whipped cream. We all stay in our pajamas, round up pillows and blankets, and gather in the family room to listen. The small children had conference packets full of coloring pages, games, and other activities to keep them occupied while they listen. The conference bingo with M&M's for markers is always a favorite. On Saturday, we spent the time between conference making caramel apples. Then while the men are at the priesthood session, all the girls in the family get together for dinner.


    All of us have things that have become "tradition" in our families. It could be as simple as a bedtime routine, or elaborate traditions surrounding holidays like Thanksgiving and Christmas. From the small everyday traditions to the more formal ones, they are all a part of what makes your family life special and should be scrapbooked so they can be remembered and carried on. Take some time to consider traditions your family has and then take pictures of them so you can record them in your scrapbook.


    To get started, think about specific things your family does each winter, spring, summer, and fall. We do a particular activity for each child's birthday in my extended family. For the birthday's in January, we build a snowman and then have hot chocolate. In March, we fly kites and have pie. In June, we have a picnic and a water fight. In October, we paint pumpkins and have chili. We combine the November and December birthdays and go sledding. All of these family activities make fun scrapbook pages.


    Does your extended family do something special to celebrate birthdays? Holidays? A new baby? Or school starting? You get the idea. Almost anything can be scrapbooked. It's fun for your family to look back through the fun things you've done together. Traditions help create a strong family and become part of the glue that holds you together.


    So, think about your own family traditions, get the camera out, and start scrapbooking.


    Return to the Neighborhood.

    Oct 5, 2008

    Conference Musings

    I realized as I drove down State Street yesterday what a unique area I live in. It's comforting to know I'm surrounded by other members of the church. It was 2:00 in the afternoon and conference had just started. I stopped at a red light and looked around while waiting for the light to change. On the radio conference played. It was at the point where they were sustaining officers of the Church. President Eyring called for a sustaining vote by the raise of the right hand. In both cars beside me, the drivers raised their hands. I smiled to myself, thinking how cool it was that although we were all apparently out on errands, we had something in common and were all listening to conference.

    At the next red light, I looked over as well. On the radio, conference was in the middle of a hymn. A little girl in the van next to me, was enthusiastically swinging her arms in time to the music as if she were leading the music.

    I've felt the same unique privileges of church membership during a recent move. If you are a member of the Church, no matter where you move, you immediately have a ward family consisting of brothers and sisters who already love you, and are already there to support and help you. I can't imagine not being a member of the Church and moving to a place where I knew no one. It sounds lonely.

    Each time I know conference is coming, I evaluate my life and decide on an issue in I'm needing particular help with. This year was no different. I came to conference with a burning question in my mind, having prayed about it, and hoping to receive an answer. I wasn't disappointed.

    As soon as President Monson said he was going to talk about change, I knew this was it. Change is not easy for me. I generally put things off, avoiding change, until there is no other choice. He said, "Most changes take place subtly and slowly." That kind of change I'm okay with. It's the kind where I have to make a decision about something that will greatly affect a change in my life, that I struggle with.

    He also said, "Time doesn't stand still. Find joy in the journey. Learn lessons about what is important and what is not. Don’t miss out on life now." I've been extremely busy lately, working several jobs and feeling spread too thin to do any of it well. I feel like I'm definitely missing out on life and what's important.

    President Monson continued, "Deal with stresses in life the best you can, but don’t let them get in the way of what’s most important. What’s most important involves the people around us. Don’t assume they know you love them." That was my answer. I need to make an important change that won't be easy, but will hopefully affect my life and the lives of those I love for the better.

    It's amazing to receive personal revelation from a loving Heavenly Father through the voice of his servants. I feel like it's a great privilege every year at conference time that I can gather my family together and listen to instructions from the Lord's servants. I hope you enjoyed conference as much as I did, and that you're ready to make the changes necessary in your own life.

    Remember President Monson's parting words: "Adapt to changes in our lives, realize what is most important, express gratitude always, and find joy in the journey."

    Oct 3, 2008

    Software Basics

    Digital scrapbooking can be done on a variety of software programs, from those designed for simple scrapbooking to full-blown professional graphics software. When selecting software it's important to keep in mind your own level of computer expertise.

    Some of the most commonly used programs are:

    -Photoshop
    -Photoshop Elements
    -Paint Shop Pro
    -Digital Image Pro
    -CorelDRAW
    -FotoFusion
    -Creating Keepsakes Scrapbook Designer Deluxe

    There are basically two types of software available to digital scrapbookers.

    1. Layout Programs - Creating Keepsakes Scrapbook Designer Deluxe is an example of this type of program. Layout programs allow you to easily assemble pre-made graphics, photos, and journaling for quick scrapbook layouts. Many layout programs do not meet the criteria that digital scrapbookers need. Either they don't support the file type you would like to use, they are not capable of high quality printing, or they only let you use pre-made graphics rather than design your own. These programs are a great way to start when you're a beginner. You can learn some simple techniques and add to them later on.

    2. Photo Editing Programs - Photoshop and Photoshop Elements are examples of this type of program. These are more powerful programs for editing photos and they work well for creating your own digital elements, but the learning curve is much higher. Google's Picasa is a great, free program to edit photos as well.

    Most digitial cameras come with some sort of photo editing software. These are a good beginning tool, but once you become a serious digital scrapbooker you will likely want a photo editing program which allows you to design your own paper, arrange photos in creative ways, create layers, add embellishments, and other unique page elements.

    It can be overwhelming, but there are lots of great tutorials on the internet and most of the software programs have free trial versions so you can try them out before you buy. When you are just starting out, don't feel like you have to buy an expensive program that does way more than you'll need it to do.

    I just wanted to give a quick overview and will talk in more detail about features of individual programs in future blogs. I hope you have a great conference weekend and be sure to create some memories you'll want to scrapbook.

    Return to the Neighborhood.
    Related Posts Plugin for WordPress, Blogger...